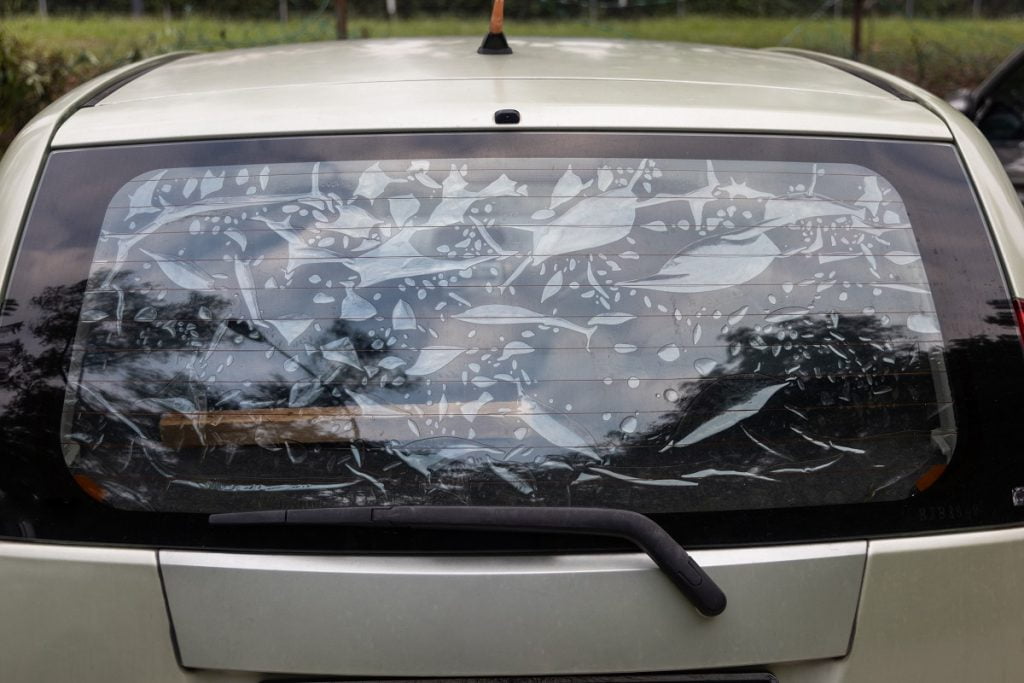
Window tinting offers numerous benefits, including reduced heat and glare, increased privacy, and enhanced aesthetics. However, over time, even the best window tint can succumb to the unsightly nuisance of bubbles. These bubbles can mar the appearance of your windows and make your home look unkempt. But don’t despair! With the right techniques and a little patience, you can restore clarity and beauty to your old window tint. Read on for a comprehensive guide to eliminating those pesky bubbles once and for all.

Image: windowtintingtoday.com
Understanding Window Tint Bubbles
Bubbles in window tint are caused by air or moisture becoming trapped between the tint film and the glass surface. This can occur during the installation process or as a result of age, exposure to sunlight, or temperature fluctuations. Identifying the cause of the bubbles is crucial for determining the most effective repair strategy.
Tools and Materials for Bubble Removal
Before embarking on this restoration mission, gather the necessary tools and materials:
- A sharp utility knife or razor blade
- A small, clean cloth or microfiber rag
- A spray bottle filled with a mixture of 1:1 isopropyl alcohol and water
- A credit card or squeegee (optional)
Step-by-Step Bubble Removal Guide

Image: autobossvaughan.com
1. Safety First
Wear gloves and eye protection during this process to avoid cuts or eye irritation. Carefully remove any curtains or blinds that may obstruct the glass surface.
2. Localized Heating
Use a hairdryer or heat gun to gently heat up the bubbled area. Avoid overheating, as this can damage the window tint. The heat will soften the adhesive, making it easier to work with.
3. Pierce the Bubble
Carefully pierce the center of the bubble with the utility knife. Use a swift and steady motion, applying light pressure. Avoid cutting into the window glass or tint film.
4. Application of Alcohol Mixture
Gently apply the alcohol mixture to the pierced bubble using the cloth. Lightly tap and massage the area to allow the alcohol to penetrate the bubble and dissolve the trapped air.
5. Smoothing the Bubble
Once the bubble is sufficiently filled with alcohol, smooth it out by applying gentle pressure with your finger or the credit card. Start from the center of the bubble and work outwards, pushing the trapped air towards the edges. Use the cloth to absorb any excess alcohol.
6. Repeat for Multiple Bubbles
Repeat steps 2-5 for any additional bubbles present on the window. Take your time and avoid rushing the process.
7. Final Drying
Once all bubbles have been removed, wipe the entire window surface with a clean cloth to remove any remaining moisture or residue. Allow the tint to dry completely, which may take a few hours.
How To Fix Bubbles In Old Window Tint
Conclusion
By following these steps, you can successfully repair bubbles in old window tint, restoring its clarity and beauty. Remember to approach the task with patience and care, and don’t hesitate to seek professional assistance if needed. Take pride in your refreshed windows and enjoy the benefits of a sleek and functional window tint once again.