If you’ve noticed unsightly white, crusty deposits marring the grout in your bathroom, you’re not alone. This common problem, known as efflorescence, can turn a once-pristine bathroom into an eyesore. But fear not! With the right knowledge and techniques, you can reclaim your grout’s pristine beauty. Let’s dive into the ins and outs of efflorescence in grout and equip you with the tools to eradicate it.
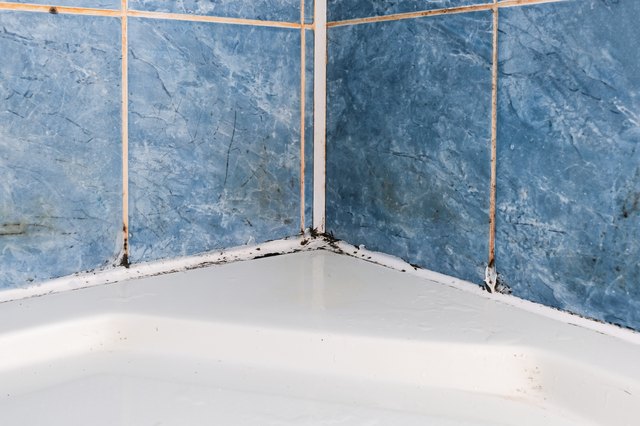
Image: www.ehow.com
Understanding the Culprit: What is Efflorescence?
Efflorescence occurs when water-soluble salts accumulate on the surface of grout. These salts are typically present in the water used to mix the grout or in the materials surrounding it. As water evaporates from the grout, these salts are left behind and crystallize, forming a powdery or crusty white deposit.
Several factors can contribute to efflorescence, including excessive moisture, improper ventilation, and inadequate sealing. Bathrooms, with their high humidity levels, are particularly prone to this issue. Understanding the causes of efflorescence is the first step in developing an effective solution.
Eradicating Efflorescence: A Step-by-Step Guide
Restoring grout from the clutches of efflorescence requires a multifaceted approach:
1. Dry Out the Area:
The initial step is to eliminate the source of moisture that’s causing the efflorescence. Check for leaks in your bathroom faucets, showerheads, or pipes. Ensure your bathroom has adequate ventilation by using an exhaust fan or opening a window during showers.
2. Clean the Grout:
Once the moisture problem is under control, it’s time to tackle the efflorescence itself. Create a cleaning solution by mixing equal parts water and white vinegar. Use a soft-bristled brush to apply the solution to the affected areas and gently scrub. Rinse thoroughly with clean water.
3. Remove Stubborn Deposits:
For stubborn efflorescence, you may need to use a stronger cleaning agent. Commercial grout cleaners specifically designed to remove efflorescence are available. Follow the instructions on the product label carefully.
4. Seal the Grout:
Once the efflorescence has been removed, it’s crucial to seal the grout to prevent future occurrences. Grout sealers form a protective barrier that repels water and prevents salts from seeping to the surface.
5. Prevent Future Build-up:
Regular cleaning and maintenance are key to preventing efflorescence from recurring. Clean your bathroom regularly and use a squeegee to remove excess water after showers. Ensure your bathroom is properly ventilated to reduce moisture levels.
Expert Insights: Tips from the Pros
Consult with experts in the field to enhance your efflorescence removal strategy:
– Choose a grout sealer with a low pH level, as highly acidic sealers can damage grout.
– Apply a second coat of sealer after the first one has dried to ensure maximum protection.
– Consider using a dehumidifier in your bathroom to reduce humidity levels and prevent efflorescence from returning.
– If your grout is severely damaged by efflorescence, you may need to remove and replace it.
Image: www.reddit.com
How To Fix Efflorescence In Grout
Conclusion – The Path to Pristine Grout
Regaining the pristine beauty of your grout is achievable by understanding the causes of efflorescence and following the recommended steps. Remember to address the underlying moisture issues, clean and seal the grout, and incorporate regular cleaning and maintenance into your routine. By implementing these measures, you can bid farewell to unsightly efflorescence and restore your bathroom’s gleaming allure.
Remember, a pristine bathroom is not just about aesthetics; it’s about creating a clean and healthy environment for you and your family. By vanquishing efflorescence in grout, you can elevate your bathroom experience and enjoy its beauty for years to come.
